Accessing a Docker Compose application via Tailscale with TLS (HTTPS)
Introduction
In this post I’ll show how I self-host Docker Compose applications that I can access from my Tailnet with TLS (i.e., via HTTPS). At the time of writing, I’ve yet to see an end-to-end example for getting this to all to work together. So I figure I can share my own setup that’s been working for about a year now. Maybe someone will comment and tell me a way simpler way to do this!1
For demo purposes, I’ll be using the server image for the Joplin app. It’s relatively simple to setup, and the Joplin mobile client requires that the server is using HTTPS/TLS. However, the same concepts apply to any Dockerized application.
The source code for this post is available on Github.
Background
Docker Compose
Docker Compose is a command line application for orchestrating multiple Docker containers on a single host. I’ve found it’s an indispensable tool for self-hosting applications.
Tailscale
Tailscale is a mesh VPN that allows users to securely connect between devices (servers, PCs, phones) across different networks, without exposing any of the devices to the public Internet. That means I can install the Tailscale client on my iPhone and connect to my Joplin server running at home, without requiring me to have both devices on the same network, and without requiring me to expose the Joplin server over the public Internet. The traffic flows device-to-device, as the Tailscale service itself is only facilitating discovery and authentication. I’ve tried a few VPNs, and Tailscale is by far the simplest and most reliable.
Joplin
Joplin is an open-source note-taking application, like Evernote circa 2014 but with Markdown. It has reliable desktop and mobile applications and provides a few options for syncing notes across devices. One of the options is to host your own storage and sync server, which is what I’m doing in this post.
Step 1: get the Joplin server running
As a first step, I just need to get the Joplin server running. I have a Docker Compose service for Joplin, configured to bind to port 80 and exposed on http://localhost:8080. For now it’s just using an ephemeral Sqlite database.2
Here’s the docker-compose.yaml file:
services:
  joplin:
    image: joplin/server:3.0.1-beta
    restart: unless-stopped
    ports:
      - 8080:80
    environment:
      - APP_PORT=80
      - APP_BASE_URL=http://localhost:8080
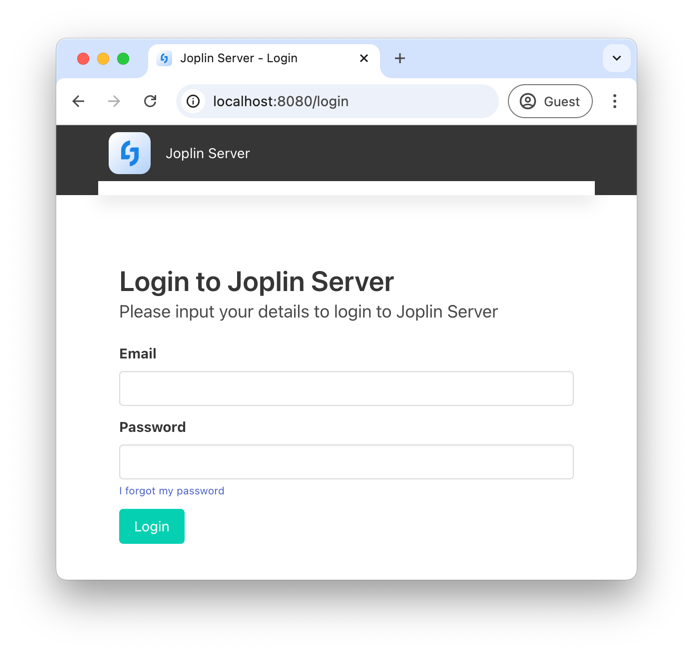
I run it with docker compose up, and I’m able to access the web UI on http://localhost:8080:
Step 2: add a Tailscale service
Now I need to add a Tailscale service to Docker Compose. I add the service with the following details:
- The
TS_HOSTNAME=joplin-serverenvironment variable tells Tailscale that this device should be accessible atjoplin-server.mytailnet.ts.net. - The
tailscalevolume andTS_STATE_DIRenvironment variable allow Tailscale to persist authentication state across restarts.
Here’s the updated docker-compose.yaml file.
services:
  joplin:
    image: joplin/server:3.0.1-beta
    restart: unless-stopped
    environment:
      - APP_PORT=80
      - APP_BASE_URL=http://localhost:8080
    ports:
      - 8080:80
  tailscale:
    image: tailscale/tailscale:v1.72.1
    volumes:
      - tailscale:/var/run/tailscale
    environment:
      - TS_HOSTNAME=joplin-server
      - TS_STATE_DIR=/var/run/tailscale
    restart: unless-stopped
volumes:
  tailscale:
When I run docker compose up, I see a log like this:
tailscale-1  | To authenticate, visit:
tailscale-1  |
tailscale-1  |  https://login.tailscale.com/a/d41d8cd98f00b2
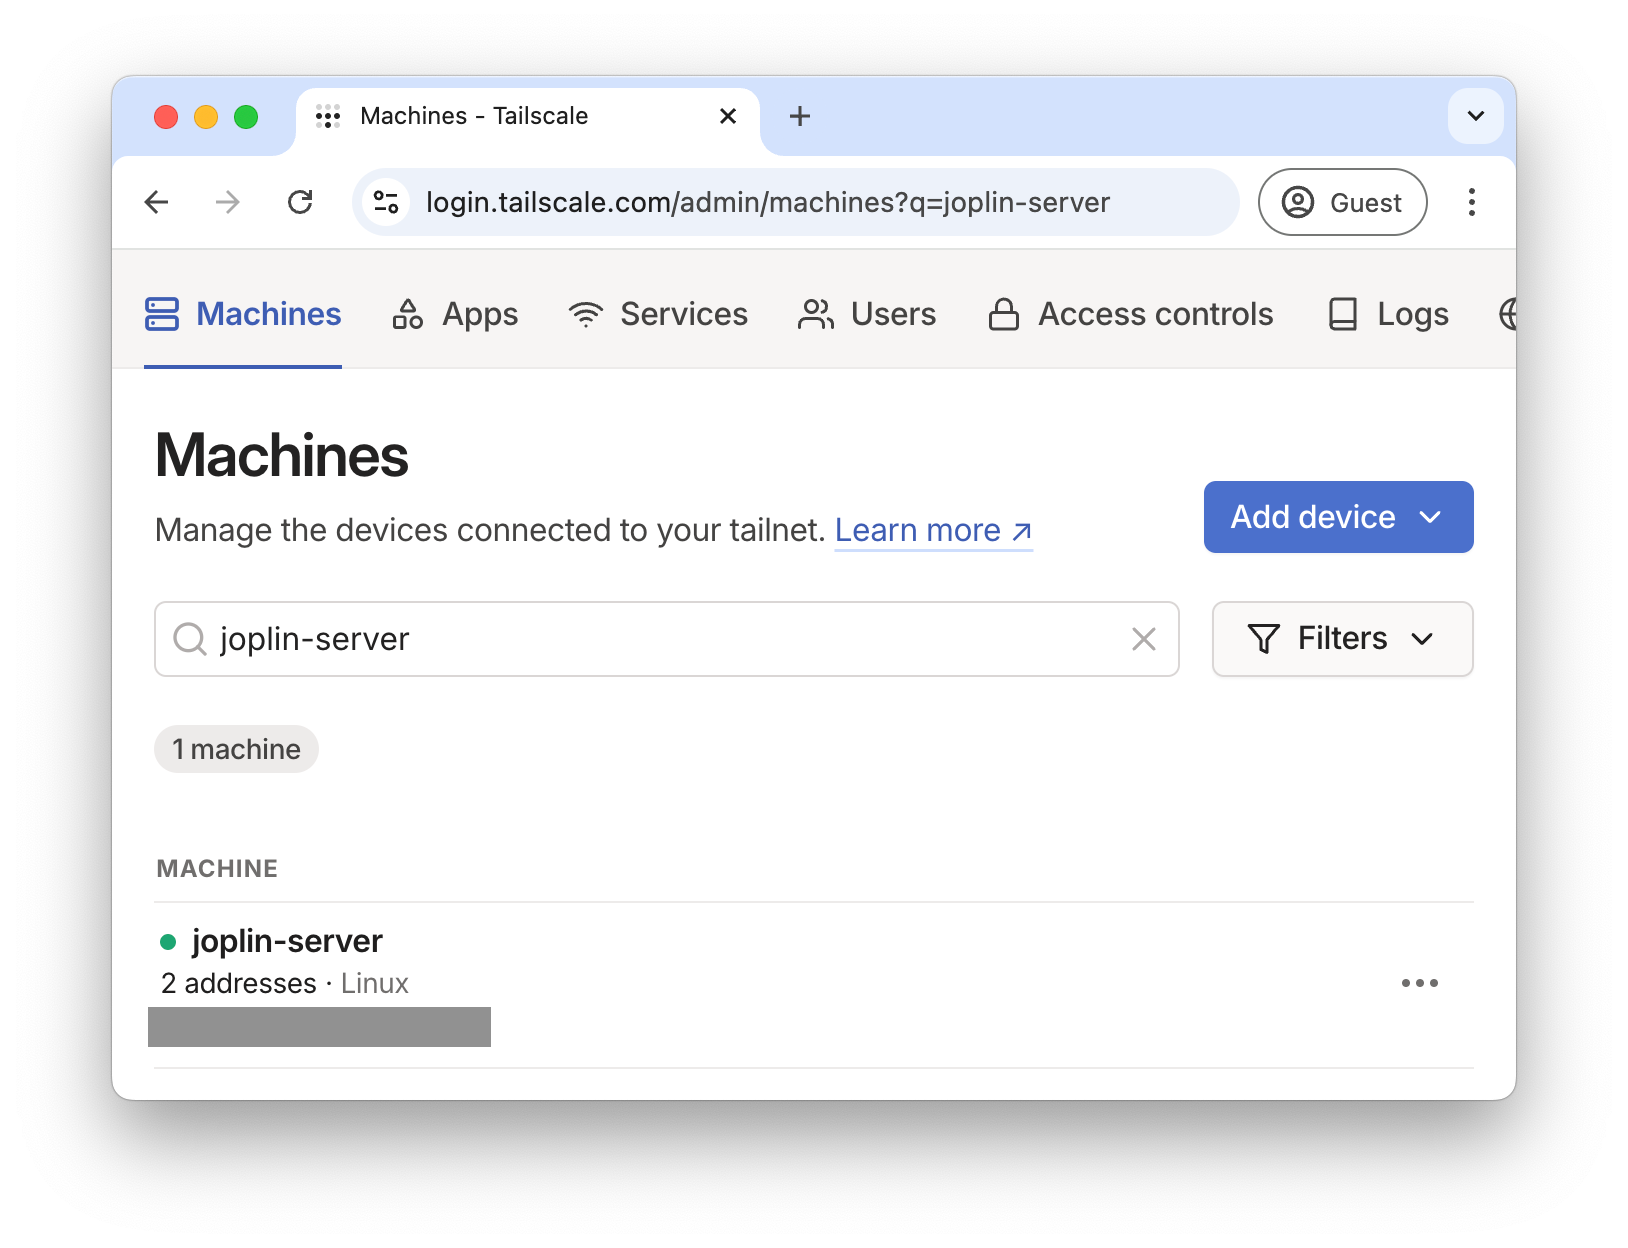
So I follow the link and Tailscale prompts me to connect the device:

After some prompts, I can see it’s online:
Step 3: access the Joplin service on my Tailnet
Now I want the Joplin service to be available on my Tailnet, at http://tailscale-server.mytailnet.ts.net.
The simplest way I’ve found to do this is still a bit more involved than I would like it to be. I need to do the following:
- I add an Nginx service, configured to use the Docker DNS and to forward traffic from port
80to the Joplin service. - I configure the Nginx service to share its network with the the Tailscale service.
Here’s the nginx.conf file.
events {}
http {
  server {
    # Telling Nginx to use the Docker internal DNS server,
    # so it can resolve the `joplin` host name.
    resolver 127.0.0.11 [::1]:5353 valid=3600s;
    set $backend "http://joplin:80";
    location / {
      proxy_pass $backend;
      proxy_set_header Host $host;
      proxy_set_header X-Real-IP $remote_addr;
      proxy_set_header X-Forwarded-For $proxy_add_x_forwarded_for;
      client_max_body_size 64M;
    }
  }
}
Here’s the updated docker-compose.yaml:
services:
  joplin:
    image: joplin/server:3.0.1-beta
    restart: unless-stopped
    environment:
      - APP_PORT=80
      - APP_BASE_URL=http://joplin-server.${TAILNET}.ts.net
  nginx:
    image: nginx:1.27.0
    volumes:
      - ./nginx-1.conf:/etc/nginx/nginx.conf
    restart: unless-stopped
    network_mode: service:tailscale
  tailscale:
    image: tailscale/tailscale:v1.72.1
    volumes:
      - tailscale:/var/run/tailscale
    environment:
      - TS_HOSTNAME=joplin-server
      - TS_STATE_DIR=/var/run/tailscale
    restart: unless-stopped
volumes:
  tailscale:
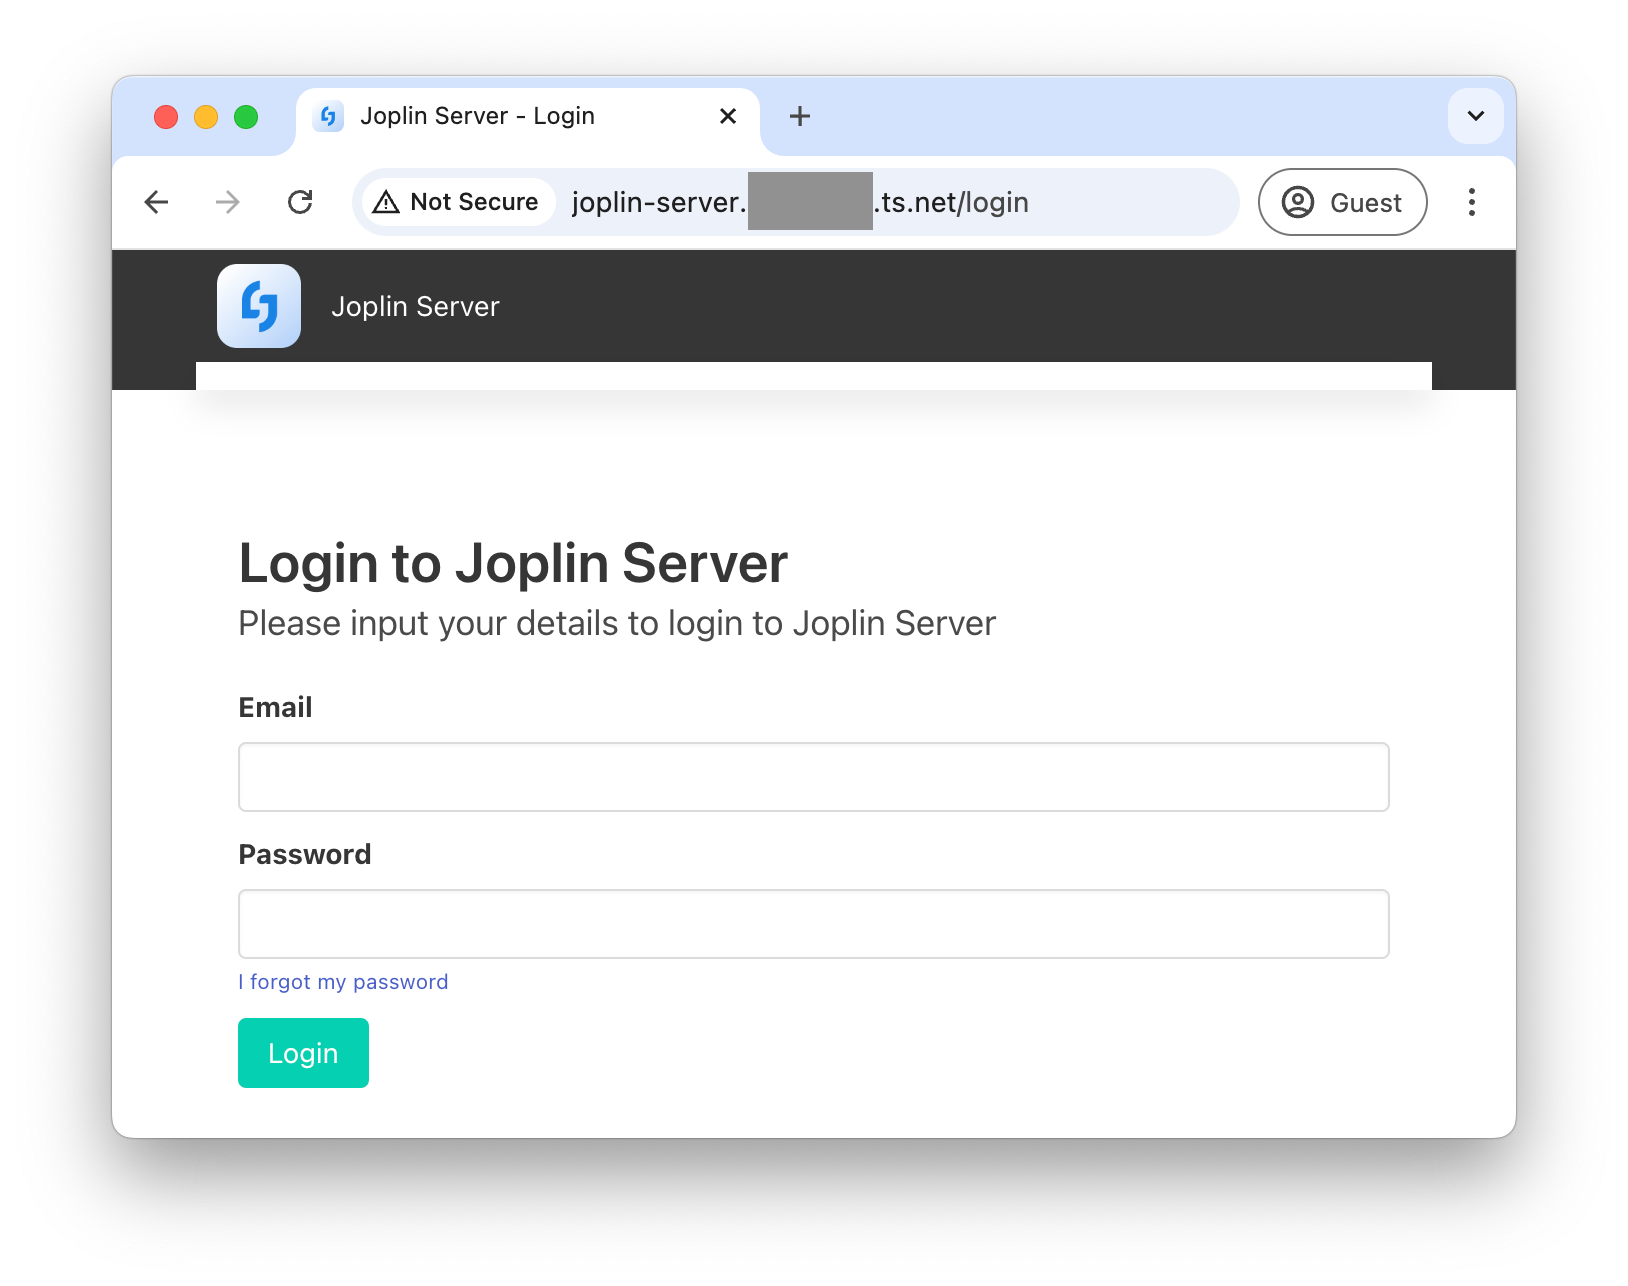
Now the Joplin service is accessible at http://joplin-server.mytailnet.ts.net:
Step 4: access the Joplin service via Tailnet with HTTPS
The server is currently accessible over HTTP, but I need it to use HTTPS. To achieve this, I’ll use the Tailscale CLI to generate the TLS key and certificate files, mount them on the the Nginx service, and configure Nginx to use them.
This requires the following changes to the docker-compose file:
- I add a
tlsvolume to store the key and certificate files. - I mount the
tlsvolume on the Nginx service in read-only mode. - I mount the
tlsvolume on the Tailscale service in read/write mode.
Here’s the updated docker-compose.yaml:
services:
  joplin:
    image: joplin/server:3.0.1-beta
    restart: unless-stopped
    environment:
      - APP_PORT=80
      - APP_BASE_URL=https://joplin-server.${TAILNET}.ts.net
  nginx:
    image: nginx:1.27.0
    volumes:
      - ./nginx-2.conf:/etc/nginx/nginx.conf
      - tls:/mnt/tls:ro
    restart: unless-stopped
    network_mode: service:tailscale
  tailscale:
    image: tailscale/tailscale:v1.72.1
    volumes:
      - tailscale:/var/run/tailscale
      - tls:/mnt/tls
    environment:
      - TS_HOSTNAME=joplin-server
      - TS_STATE_DIR=/var/run/tailscale
    restart: unless-stopped
volumes:
  tailscale:
  tls:
I need to configure Nginx to use the key and certificate, so I modify the Nginx conf file to include the listen 443 ssl, ssl_certificate, and ssl_certificate_key directives.
events {}
http {
  server {
    resolver 127.0.0.11 [::1]:5353 valid=15s;
    set $backend "http://joplin:80";
    listen 443 ssl;
    ssl_certificate /mnt/tls/cert.pem;
    ssl_certificate_key /mnt/tls/cert.key;
    location / {
      proxy_pass $backend;
      proxy_set_header Host $host;
      proxy_set_header X-Real-IP $remote_addr;
      proxy_set_header X-Forwarded-For $proxy_add_x_forwarded_for;
      client_max_body_size 64M;
    }
  }
}
I start the services via docker compose up --detach.
If I look at the logs at this point, Nginx is crashing and restarting, because there’s no key and cert file yet.
To generate the key and cert files, I use the tailscale cert command via docker compose exec:
$ docker compose exec tailscale \
    /bin/sh -c "tailscale cert --cert-file /mnt/tls/cert.pem --key-file /mnt/tls/cert.key joplin-server.mytailnet.ts.net"
Wrote public cert to /mnt/tls/cert.pem
Wrote private key to /mnt/tls/cert.key
When Nginx restarts, it picks up these files and starts proxying requests with TLS.
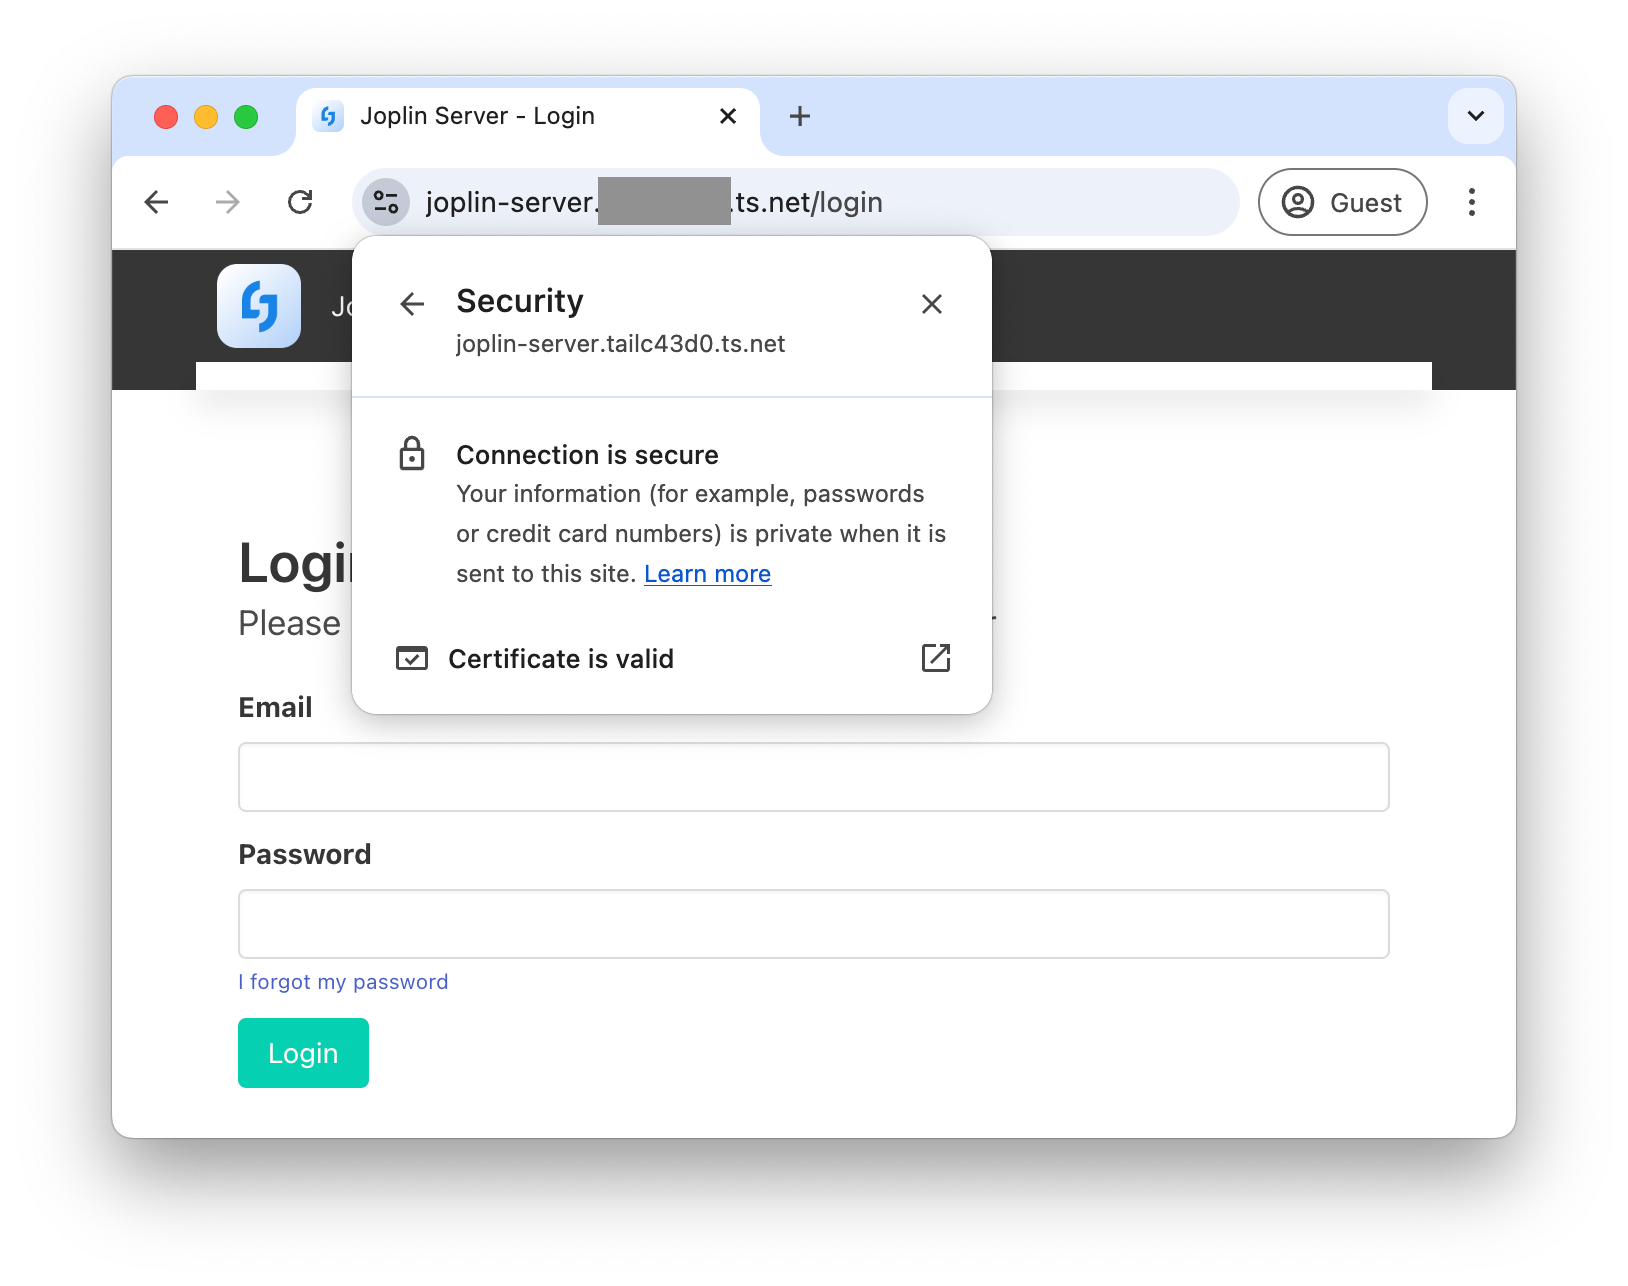
And finally, I can access the Joplin server over HTTPS, at https://joplin-server.mytailnet.ts.net:
Step 5: Maintenance
I’ve been running this setup in several Docker Compose applications for about a year now.
The only required maintenance is periodically re-generating the certificates.
I have the docker compose exec command in a script called renew_certs.sh, and I’m using Uptime Kuma to notify me when the certs are nearing their expiry.
I could automate this with a simple cronjob, but this is easy enough.
Conclusion
So this is how I self-host Docker Compose applications on my Tailnet with TLS. The setup is maybe a bit more complicated than I’d like; I somewhat wish Nginx wasn’t necessary here. Please comment if you know of a simpler way! It’s been working reliably for about a year now, so hopefully the write-up is useful for some other self-hosters.
-
I’ve found a useful tactic for gleaning new information on the Internet is to semi-confidently state something you’re unsure about. More often than not, someone suddenly appears to correct you. ↩
-
You can use a persistent Postgres database based on this docker-compose.yaml file, but I recommend waiting until after getting all the Tailscale and HTTPS working, to avoid unnecessary intermediate complexity. ↩